To enhance security and prevent Windows XP from automatically logging on:
Click on the Start Button, select Run, and type rundll32 netplwiz.dll,ClearAutoLogon
No confirmation will be displayed, but when you restart the machine the Welcome Screen with a login prompt will appear. (A plain login box could also appear, depending on your system settings.)
There are two other working methods to stop the auto logon, at the link below.
Thanks to Ramesh for detailing several methods to stop the auto logon in Windows XP
Why I shared this tip:
Last night I setup a Windows XP virtual machine in Parallels (on a mac). This was on a shared computer and so I needed to prevent the others users from having immediate access to Windows XP until they were given access.
Showing posts with label virtual-os. Show all posts
Showing posts with label virtual-os. Show all posts
Tuesday, October 4, 2011
Saturday, November 28, 2009
Upgrading to Parallels 5 from a Disk Image
After getting Parallels 5 from Mininova, one of my favorite torrent sites, I went about upgrading to Parallels 5 and figuring out how to migrate my Windows XP virtual machine created with Parallels 3.
If you got the DMG (disc image) from a torrent, I recommend first burning this to a CD before beginning, because that was the one step that made me pause half-way through the process.
Be prepared to allow up to an hour for this process. This does include the time to backup your virtual machine to an external hard drive.
The whole process took me about 40 minutes until my virtual machine was converted and ready to be used again. This 40 minutes included 10 minutes to burn and verify the CD from the DMG file on my MacBook Pro.
Backup your old Parallels VM to an external drive.
My Windows XP virtual machine was only about 12 GB. Make sure to backup yours to an external hard drive before beginning. This will save time later. Copy the whole Parallels folder containing the VM and any Snapshots you have created.
Note: You will only be able to back this up to an external drive that is Mac formatted. Most external drives come pre-formatted in FAT32 which does not support files larger than 4GB.
Install Parallels 5
It installs pretty quickly from a disk image.
Disconnect from the internet before doing entering the serial number for activation.
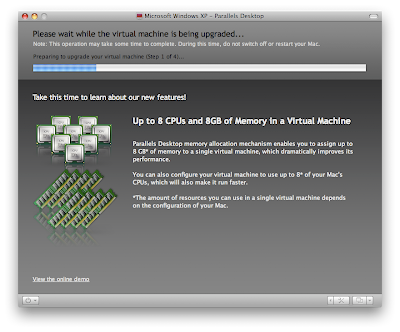
Open Parallels 5 and then open your virtual machine created with Parallels 3 or 4. It will prompt you to begin the conversion to the new virtual disk format. Shown below is step 1. Parallels 5 will prompt you to backup the old version of your virtual disk before continuing, in case anything goes wrong during the conversion process.
Install the new version of Parallels Tools with the Parallels CD.
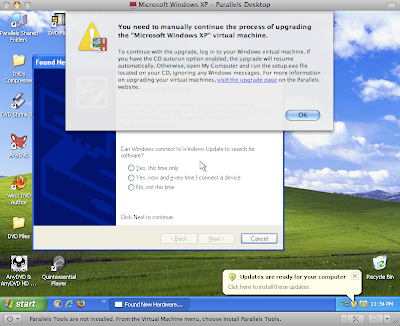
Parallels will load the virtual machine and then prompt you to "manually continue the process of upgrading the virtual machine". Click Ok, insert the Parallels CD (you should have burned earlier), and ignore any Windows messages. (Follow the instructions that Parallels provides.)
Sit Back and Let Parallels Complete the Process
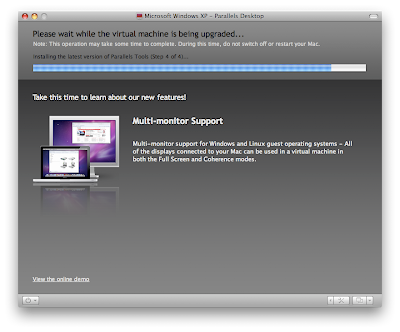
After running the setup from the Parallels CD, the rest of the process appears to be automated. It will go through two more steps show below and then finish. This should take a few minutes, depending on your configuration.
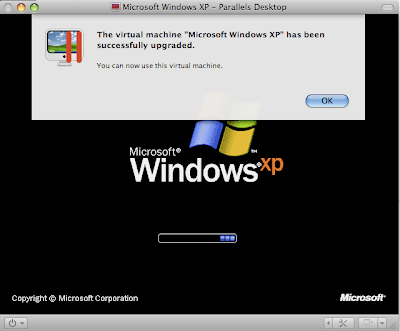
Voila. Your virtual machine is now migrated to Parallels 5.
It you're upgrading from Parallels 3 you should notice several changes in the interface and huge improvements in the speed of the virtual machine. I noticed that is was no longer suffering from graphics lag issues that plagued Parallels 3.
If you got the DMG (disc image) from a torrent, I recommend first burning this to a CD before beginning, because that was the one step that made me pause half-way through the process.
Be prepared to allow up to an hour for this process. This does include the time to backup your virtual machine to an external hard drive.
The whole process took me about 40 minutes until my virtual machine was converted and ready to be used again. This 40 minutes included 10 minutes to burn and verify the CD from the DMG file on my MacBook Pro.
Backup your old Parallels VM to an external drive.
My Windows XP virtual machine was only about 12 GB. Make sure to backup yours to an external hard drive before beginning. This will save time later. Copy the whole Parallels folder containing the VM and any Snapshots you have created.
Note: You will only be able to back this up to an external drive that is Mac formatted. Most external drives come pre-formatted in FAT32 which does not support files larger than 4GB.
Install Parallels 5
It installs pretty quickly from a disk image.
Disconnect from the internet before doing entering the serial number for activation.
Open Parallels 5 and then open your virtual machine created with Parallels 3 or 4. It will prompt you to begin the conversion to the new virtual disk format. Shown below is step 1. Parallels 5 will prompt you to backup the old version of your virtual disk before continuing, in case anything goes wrong during the conversion process.

Install the new version of Parallels Tools with the Parallels CD.
Parallels will load the virtual machine and then prompt you to "manually continue the process of upgrading the virtual machine". Click Ok, insert the Parallels CD (you should have burned earlier), and ignore any Windows messages. (Follow the instructions that Parallels provides.)

Sit Back and Let Parallels Complete the Process
After running the setup from the Parallels CD, the rest of the process appears to be automated. It will go through two more steps show below and then finish. This should take a few minutes, depending on your configuration.

Voila. Your virtual machine is now migrated to Parallels 5.
It you're upgrading from Parallels 3 you should notice several changes in the interface and huge improvements in the speed of the virtual machine. I noticed that is was no longer suffering from graphics lag issues that plagued Parallels 3.

Wednesday, August 12, 2009
Sunday, August 2, 2009
Games on VirtualBox
"Any game that doesn't require 3d acceleration and is supported by your guest OS will work, there is no reason for it not to"
from the VirtualBox forums this thread describes several games that work in Vbox.
Monopoly version unknown, screenshot here
Project64 and Super Mario 64
Risk 2 screenshot here
Worms World Party screenshot here
Zsnes a Super Nintendo emulator
Most of posters who tested games that worked successfully were using Windows XP SP2 and some were using SP3.
VirtualBox version 3.0 released in June with a full Changelog here added support for OpenGL 2.0 and
I'd like to confirm that these games work in VirtualBox:
Call of Duty
Jedi Knight 2: Jedi Outcast
Return to Castle Wolfenstein
Tomb Raider I/II/III
Worms 3D
For the younger brother:
Insaniquarium Deluxe (I expect this would work if more complex games run successfully.)
Who Wants to Be a Millionaire
Subscribe to:
Posts (Atom)